Guide on Using AWS with WordPress

Introduction:

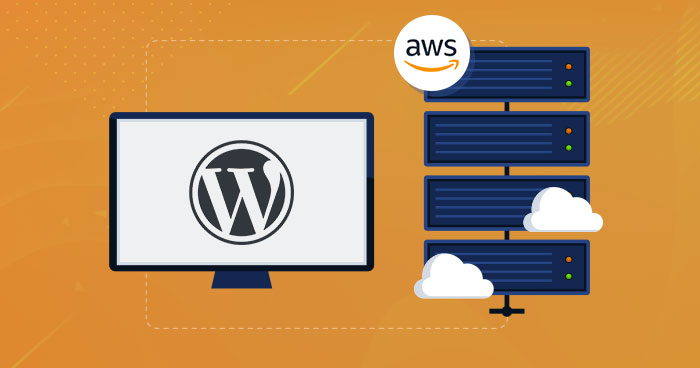
AWS (Amazon Web Services) is a cloud-based platform that provides various services for hosting websites and applications. WordPress is a popular open-source content management system that is used for creating and managing websites. In this guide, we will explore how to use AWS with WordPress to create a scalable and highly available website.

Scaling your WordPress site with AWS:

One of the key benefits of using AWS to host your WordPress site is the ability to scale resources as needed. You can easily increase or decrease the amount of computing power, storage, and memory that your site uses, depending on the amount of traffic it receives.

To scale your WordPress site with AWS, you can use the following services:

  1. Auto Scaling: Automatically increases or decreases the number of EC2 instances based on demand.
  2. Elastic Load Balancer (ELB): Automatically distributes incoming traffic across multiple EC2 instances.
  3. CloudFront: Amazon’s content delivery network that speeds up the delivery of your site’s static content.

By using these services, you can ensure that your WordPress site has the resources it needs to handle increased traffic without any downtime.

Backing up your WordPress site with AWS:

Another important aspect of using AWS to host your WordPress site is ensuring that your data is protected. To do this, you can use the following services to backup your site’s data:

  1. Amazon S3: A highly scalable and durable object storage service that you can use to store backups of your WordPress site.
  2. Amazon RDS: Automatically backs up your database on a set schedule and provides point-in-time recovery options.
  3. AWS Backup: A centralized backup service that makes it easy to manage backup and recovery for AWS services.

By using these services, you can ensure that your WordPress site’s data is protected and can be easily restored in the event of an issue.

Monitoring and optimizing your WordPress site with AWS:

Finally, it’s important to monitor and optimize your WordPress site to ensure that it is performing well. To do this, you can use the following services:

  1. Amazon CloudWatch: A monitoring service that provides real-time visibility into resource utilization, application performance, and operational health.
  2. Amazon Route 53: A highly available and scalable domain name system (DNS) service that helps ensure that your site is accessible.
  3. Amazon CloudFront: Provides real-time analytics on how your site’s content is being delivered.

By using these services, you can monitor the performance of your WordPress site and make any necessary optimizations to ensure that it is running smoothly.

Steps on Getting Started With AWS for WordPress:

Step 1: Choose an AWS service for hosting your WordPress site

There are several AWS services that can be used for hosting WordPress sites. Some of the most popular options include:

  • EC2 (Amazon Elastic Compute Cloud) – A virtual machine service allows you to run applications and services.
  • Elastic Beanstalk – A platform that makes it easy to deploy and run applications in the cloud.
  • Lightsail – A managed service that provides a simple way to launch and manage WordPress sites.

Each of these services has its own advantages and disadvantages, so you’ll need to decide which one is right for you based on your needs. You can find more information about each of these services on the AWS website: https://aws.amazon.com/

Step 2: Create an Amazon S3 bucket for storing your media files

Amazon S3 is a cloud-based storage service that can be used to store your WordPress site’s media files. To create an S3 bucket, follow these steps:

  1. Log in to your AWS account.
  2. Go to the S3 service.
  3. Click the “Create bucket” button.
  4. Give your bucket a unique name and choose the region in which you want to store your files.
  5. Click the “Create” button to create your bucket.

Step 3: Configure your Amazon S3 bucket for WordPress

To configure your S3 bucket for WordPress, follow these steps:

  1. Log in to your AWS account.
  2. Go to the S3 service.
  3. Click on the bucket that you created in step 2.
  4. Click the “Properties” tab.
  5. Click the “Static website hosting” option.
  6. Select the “Use this bucket to host a website” option.
  7. Enter the name of your WordPress site’s index file (e.g. “index.html” or “index.php”) and the name of your error document (e.g. “404.html”).
  8. Click the “Save” button to save your changes.

Step 4: Set up a database for your WordPress site

WordPress requires a database to store your site’s data. You can use Amazon RDS (Relational Database Service) to set up a database for your WordPress site. To create an RDS instance, follow these steps:

  1. Log in to your AWS account.
  2. Go to the RDS service.
  3. Click the “Create database” button.
  4. Choose the database engine that you want to use (e.g. MySQL).
  5. Choose the instance type that you want to use.
  6. Give your database a name and specify a username and password.
  7. Click the “Create database” button to create your RDS instance.

Step 5: Install WordPress on your AWS instance

To install WordPress on your AWS instance, follow these steps:

  1. Log in to your AWS instance.
  2. Download the latest version of WordPress from the official WordPress website: https://www.wordpress.com
  3. Extract the WordPress files to your instance.
  4. Create a new database for your WordPress site.
  5. Run the WordPress installation script.
  6. Fill in the required

Once your RDS instance is created, you’ll need to connect your WordPress site to the database. To do this, follow these steps:

  1. Log in to your WordPress site.
  2. Go to the “Settings” section.
  3. Click the “Databases” option.
  4. Enter the database hostname, username, password, and database name.
  5. Click the “Save” button to save your changes.

Step 6: Configure your WordPress site for AWS

To configure your WordPress site for AWS, you’ll need to use a plugin such as the Amazon Web Services plugin. To install and configure the plugin, follow these steps:

  1. Log in to your WordPress site.
  2. Go to the “Plugins” section.
  3. Click the “Add new” button.
  4. Search for “Amazon Web Services” and install the plugin.
  5. Go to the “Settings” section and click the “AWS” option.
  6. Enter your AWS access key and secret key.
  7. Click the “Save” button to save your changes.

AWS CloudFront For WordPress

AWS CloudFront is a content delivery network (CDN) service offered by Amazon Web Services (AWS). It can be used to optimize the delivery of your WordPress site’s static content, such as images, videos, and CSS files. By using CloudFront, you can improve the performance of your WordPress site by reducing the latency and improving the overall user experience for your visitors.

Here’s how to set up AWS CloudFront for your WordPress site:

  1. First, create an AWS account if you don’t already have one.
  2. Next, log in to the AWS Management Console and navigate to the CloudFront dashboard.
  3. Click the “Create Distribution” button to create a new CloudFront distribution.
  4. Select the “Web” delivery method, and then choose the origin that you want to use. This is typically the URL of your WordPress site.
  5. In the “Default Cache Behavior Settings” section, configure the settings for your CloudFront distribution. For example, you can set the minimum and maximum TTL values for your cached content, and choose whether to use HTTP or HTTPS.
  6. Next, create a custom error response to handle any errors that may occur when delivering your content.
  7. Finally, review the settings for your CloudFront distribution and click the “Create Distribution” button to complete the setup process.

After your CloudFront distribution is created, you will be given a unique URL that you can use to access your content. To use CloudFront with your WordPress site, you will need to modify your site’s URL settings to point to the CloudFront URL. You can do this by updating your site’s settings in the WordPress dashboard or by modifying your site’s code directly.

Here’s an example of code that you can use to modify the URL settings in your WordPress site’s code:

define('WP_CONTENT_URL', 'http://<cloudfront-domain>.cloudfront.net/wp-content');
define('WP_PLUGIN_URL', 'http://<cloudfront-domain>.cloudfront.net/wp-content/plugins');
define('WP_CONTENT_DIR', ABSPATH . 'wp-content');
define('WP_PLUGIN_DIR', ABSPATH . 'wp-content/plugins');

By using AWS CloudFront with your WordPress site, you can improve the performance and user experience for your visitors. With CloudFront’s global network of edge locations, your content will be delivered quickly and reliably to visitors, regardless of where they are located. Additionally, CloudFront provides real-time analytics and detailed performance metrics, so you can monitor the delivery of your content and make any necessary optimizations.

AWS AWF and AWS Shield For WordPress:

AWS WAF (Web Application Firewall) and AWS Shield are security services offered by Amazon Web Services (AWS) that can be used to protect your WordPress site from various types of attacks, such as SQL injection, cross-site scripting (XSS), and DDoS attacks.

Here’s how to set up AWS WAF and Shield for your WordPress site:

  1. First, create an AWS account if you don’t already have one.
  2. Next, log in to the AWS Management Console and navigate to the WAF & Shield dashboard.
  3. To set up WAF, click the “Create Web ACL” button to create a new Web Access Control List (ACL).
  4. In the “Create Web ACL” wizard, choose the AWS resource that you want to protect (e.g., your WordPress site) and configure the settings for your Web ACL.
  5. To set up Shield, navigate to the AWS Shield dashboard and enable the service. By enabling Shield, you can protect your WordPress site from common DDoS attacks.
  6. To further secure your WordPress site, you can also implement additional security measures, such as SSL/TLS certificates, strong passwords, and regular software updates.

By using AWS WAF and Shield with your WordPress site, you can protect your site from various types of attacks and improve the overall security of your site. WAF provides granular control over the incoming traffic to your site, allowing you to block or allow requests based on specific conditions. And with Shield, you can protect your site from common DDoS attacks without needing to manage any infrastructure or security software.

In conclusion, by using AWS WAF and Shield with your WordPress site, you can improve the security of your site and protect it from various types of attacks. With these services, you can have peace of mind knowing that your site is secure and protected from potential security threats.

Conclusion:

By following these steps, you can use AWS to host your WordPress site and take advantage of the scalability, reliability, and security that the platform offers. If you have any questions or need additional help, you can find more information on the AWS website: https://aws.amazon.com/

In conclusion, AWS is a powerful and flexible platform that can be used to host WordPress sites. By following the steps outlined in this guide, you can set up a scalable and highly available website that takes advantage of the benefits of cloud computing.

How to Download An Object From AWS S3 bucket

Introduction to AWS S3 bucket :

Amazon S3 (Simple Storage Service) is a powerful, flexible, and highly scalable cloud storage service provided by Amazon Web Services (AWS). It allows users to store and retrieve large amounts of data, such as images, videos, and documents, from anywhere in the world.

In this blog post, we will discuss how to download an object from an AWS S3 bucket using the AWS Command Line Interface (CLI). Whether you’re a developer, a system administrator, or a data scientist, understanding how to download objects from S3 can be a valuable skill to have in your toolkit. In this guide, we will cover the basic steps involved in downloading an object from an AWS S3 bucket, including how to authenticate your AWS account, how to specify the object you want to download, and how to configure the download settings. By the end of this post, you will have the knowledge and tools necessary to download objects from S3 quickly and easily.

AWS S3 bucket

Steps To Download An Object From AWS S3 bucket :

1. First, you will need to install the AWS Command Line Interface (CLI) on your local machine. This can be done by following the instructions on the AWS CLI installation page (https://docs.aws.amazon.com/cli/latest/userguide/install-cliv2.html)

2. Once you have the AWS CLI installed, you will need to configure your AWS credentials by running the command aws configure. This will prompt you to enter your AWS access key and secret key, as well as your default region.

3. To download an object from an AWS S3 bucket, you will use the aws s3 cp' command. The basic syntax of the command is as follows:

aws s3 cp s3://<bucket-name>/<object-key> <local-file-path>

In this command, you will need to replace <bucket-name> the name of the S3 bucket you wish to download from, and <object-key> with the key of the object you wish to download. The <local-file-path> is the location on your local machine where you want to save the downloaded object.

4. For example, if you wanted to download an object called “image.jpg” from an AWS S3 bucket called “my-bucket”, and save it to a folder called “downloads” on your local machine, you would run the following command:

aws s3 cp s3://my-bucket/image.jpg downloads/image.jpg

5. In case you want to download the whole bucket, you can use the following command:

aws s3 cp s3://my-bucket/ downloads/ --recursive

6. You can also download multiple objects in parallel using the --no-guess-mime-type option and the --exclude' and --include' options to filter the files you want to download.

aws s3 cp s3://my-bucket/ downloads/ --recursive --no-guess-mime-type --exclude "*" --include "*.jpg"

7. And if you want to download only some specific folders and files, you can use the following command:

aws s3 cp s3://my-bucket/folder1/ downloads/ --recursive --no-guess-mime-type --exclude "*" --include "*.jpg"

8. And if you want to download the whole bucket with a specific prefix, you can use the following command:

aws s3 cp s3://my-bucket/folder1/ downloads/ --recursive --no-guess-mime-type --exclude "*" --include "*.jpg"

9. You can use the option if you need to download files or folders from an S3 bucket that is in a different region than your default region. For example:

aws s3 cp s3://my-bucket/folder1/ downloads/ --recursive --no-guess-mime-type --exclude "*" --include "*.jpg" --region <region-name>

10. Once you’ve run the command, the object will be downloaded to your local machine. You can then access the object from the specified local file path.

Note: Ensure you have the necessary permissions to access the S3 bucket and the object you want to download. Also, replace the placeholders in the commands (e.g. <bucket-name>, <object-name>) with the actual values for your S3 bucket and object.

Terms & Concepts Relating To AWS S3 bucket

  • <bucket_name>' is the name of the S3 bucket where the folder is located.
  • <folder_name>is the name of the folder you want to download.
  • <local_directory>' is the local directory where you want to download the folder to.
  • --recursive' flag is used to copy all files and subfolders in the specified folder.

For example, if your bucket name is “my-bucket” and the folder you want to download is called “data”, you would use the following command to download the folder to your local machine:

aws s3 cp s3://my-bucket/data C:\data --recursive

This command will download the entire “data” folder from the “my-bucket” AWS S3 bucket to the “C:\data” directory on your local machine.

Optional/Advanced Steps:

  • If you want to download the objects with a certain prefix

aws s3 cp s3://bucket-name/folder/ --recursive --exclude "*" --include "*.jpg"

  • If you want to download the object and rename it while downloading

aws s3 cp s3://bucket-name/object-name local-directory/new-object-name

  • If you want to download the object with only showing the error and not the progress

aws s3 cp s3://bucket-name/object-name local-directory --only-show-errors

Note: Ensure you have permission to access the object and bucket you are trying to download. Also, make sure to replace the variables bucket-name, object-name, and local-directory with the appropriate values for your specific use case.

Order An Android App With Admob Ads : Click Here!

Getting Started With Amazon Web Services (AWS) as a cloud engineer!

Welcome to this guide on getting started with Amazon Web Services (AWS) as a cloud engineer / AWS cloud engineer !

SOURCE : Wikimedia Commons (AWS)

AWS is a cloud computing platform that offers a wide range of services, including computing, storage, and networking, as well as tools for building and managing applications. With AWS, you can build and deploy your applications quickly, with the ability to scale up or down as needed.

AWS is a popular choice for many companies due to its flexibility, scalability, and reliability. In fact, AWS is the dominant player in the cloud computing market, with a 32% market share as of 2021.

In this guide, we’ll cover the following topics:

  • An overview of AWS and its services
  • Setting up an AWS account
  • Getting started with the AWS Management Console
  • Key concepts and terminology in AWS
  • Preparing for the AWS Certified Solutions Architect exam

Let’s get started!

1. An Overview of AWS

AWS offers a wide range of services, organized into the following categories:

  • Computing
  • Storage
  • Database
  • Networking
  • Analytics
  • Security, Identity, & Compliance
  • Management Tools
  • Developer Tools
  • Internet of Things (IoT)
  • Mobile Services
  • Artificial Intelligence (AI)
  • Augmented Reality (AR) & Virtual Reality (VR)
  • Game Development
  • Customer Engagement
  • Business Applications

In this guide, we’ll focus on the core services that are most relevant to cloud engineers.

These include:

  • Amazon Elastic Compute Cloud (EC2) for computing
  • Amazon Simple Storage Service (S3) for storage
  • Amazon Relational Database Service (RDS) for databases
  • Amazon Virtual Private Cloud (VPC) for networking

Let’s take a brief look at each of these services.

Amazon Elastic Compute Cloud (EC2)

EC2 is a web service that provides resizable compute capacity in the cloud. It allows you to launch virtual servers, called “instances,” which can be customized to your needs. You can choose the instance type, which determines the hardware specifications of the instance, as well as the operating system and software packages that are installed.

EC2 is a central part of AWS, and it’s the service that most people think of when they think of AWS. It’s a key building block for many other AWS services, and it’s the service that you’ll use most often as a cloud engineer.

Amazon Simple Storage Service (S3)

S3 is an object storage service that allows you to store and retrieve large amounts of data from anywhere on the web. It’s designed for scalability, with the ability to store and retrieve any amount of data from anywhere. S3 is a popular choice for storing static assets, such as images and videos, as well as for storing data for backup and disaster recovery.

Amazon Relational Database Service (RDS)

RDS is a managed database service that makes it easy to set up, operate, and scale a relational database in the cloud. RDS supports a variety of database engines, including MySQL, PostgreSQL, and Oracle. With RDS, you can create and manage databases, perform backups and restores, and scale the database up or down as needed.

Amazon Virtual Private Cloud (VPC)

VPC is a virtual networking service that allows you to create a logically isolated section of the AWS cloud where you can launch AWS resources in a virtual network that you define. With VPC, you can create your own network topology, specify security and access control, and choose your own IP address range. VPC is a key component of AWS.

2. Setting up an AWS Account

To set up an AWS account, follow these steps:

  • Go to the AWS homepage (https://aws.amazon.com/).
  • Click the “Create a free account” button.
  • Follow the prompts to enter your information and create a new account. This will include entering your email address, creating a password, and providing a phone number for account verification.
  • After you have completed the registration process, you will need to provide a credit card or other payment method to set up your account. This is required even for the free tier of AWS services.
  • Once your payment method has been set up, you will be able to access the AWS Management Console and start using AWS services.

3. Getting Started With AWS Management Console

Here are some steps you can follow to get started with the AWS Management Console after you have signed up for an AWS account/ AWS cloud engineer :

  • Sign in to the AWS Management Console: Go to the AWS home page (https://aws.amazon.com/) and click on the “Sign In to the Console” button. Then, enter your email address and password to sign in.
  • Explore the AWS Management Console: The AWS Management Console is organized by service, so you can easily find and access the services you need. Take some time to explore the console and familiarize yourself with the different services and features available.
  • Create an Amazon Elastic Compute Cloud (Amazon EC2) instance: Amazon EC2 is a web service that provides secure, resizable compute capacity in the cloud. To create an Amazon EC2 instance, go to the EC2 dashboard and click on the “Launch Instance” button. Follow the prompts to select an Amazon Machine Image (AMI), choose an instance type, and configure your instance.
  • Create an Amazon Simple Storage Service (Amazon S3) bucket: Amazon S3 is an object storage service that allows you to store and retrieve data from anywhere on the web. To create an Amazon S3 bucket, go to the S3 dashboard and click on the “Create Bucket” button. Follow the prompts to choose a bucket name and configure your bucket.
  • Create an Amazon Relational Database Service (Amazon RDS) database: Amazon RDS is a web service that makes it easy to set up, operate, and scale a relational database in the cloud. To create an Amazon RDS database, go to the RDS dashboard and click on the “Create Database” button. Follow the prompts to choose a database engine, select a database instance size, and configure your database.

Learn more about AWS services: There are many other AWS services that you can use to build and run your applications. To learn more about these services, you can visit the AWS documentation page (https://docs.aws.amazon.com/). You can also take advantage of the numerous resources and training materials available on the AWS website (https://aws.amazon.com/resources/).

4. Key concepts and terminology in AWS

AWS (Amazon Web Services) is a collection of cloud computing services that make up a cloud computing platform, offered by Amazon.com. AWS offers a wide range of services, including computing, storage, networking, database, analytics, machine learning, security, and application development, among others.

Here are some key concepts and terminology in AWS:

  • Amazon Elastic Compute Cloud (EC2):
  • Amazon Simple Storage Service (S3):
  • Amazon Virtual Private Cloud (VPC):
  • Amazon Elastic Block Store (EBS):
  • Amazon Relational Database Service (RDS):
  • Amazon Elastic Kubernetes Service (EKS):

These are just a few examples of the many services offered by AWS. There are many more, including services for machine learning, analytics, security, and application development.

5. Preparing for the AWS Certified Solutions Architect exam

Preparing for the AWS Certified Solutions Architect exam can seem like a daunting task, but with the right approach and resources, it is definitely achievable. Here are some tips to help you prepare for the exam:

  1. Familiarize yourself with the AWS Well-Architected Framework: This framework provides a set of best practices for designing and operating reliable, secure, efficient, and cost-effective systems in the cloud.
  2. Understand the exam objectives: Make sure you understand what is covered in the exam and how each topic is weighted. You can find the exam objectives on the AWS website.
  3. Practice using the AWS Management Console: The AWS Management Console is a web-based interface that you can use to access and manage AWS services. Familiarizing yourself with the console will help you feel more comfortable with the exam environment.
  4. Take an AWS training course: AWS offers a variety of training courses that can help you prepare for the exam. These courses are taught by AWS experts and provide hands-on experience with the AWS platform.
  5. Use study materials and practice exams: There are numerous study guides, video courses, and practice exams available online that can help you prepare for the exam. Using these resources can help you identify areas where you need to focus your studies.

Remember to give yourself enough time to study and to pace yourself. It is important to be well-rested and relaxed on the day of the exam. Good luck!

Getting Started With AWS As Cloud Engineer – STEPS

  1. Sign up for an AWS account: The first step in getting started with AWS as a cloud engineer is to sign up for an AWS account. You can sign up for a free account, which includes a free tier of services that can be used to learn and experiment with the platform.
  2. Learn the basics: Before diving into more advanced services, it’s important to have a good understanding of the basics of AWS. This includes understanding the different services that are available, as well as the concepts of regions, availability zones, and security groups.
  3. Experiment with the AWS Management Console: Once you have a basic understanding of the platform, start experimenting with the AWS Management Console. This is the web-based interface that allows you to access and manage AWS services.
  4. Launch an EC2 instance: One of the first things you’ll want to do as a cloud engineer is to launch a virtual machine (VM) in the cloud. This can be done using the EC2 service, which allows you to launch a variety of different instance types with different configurations.
  5. Store and retrieve data: Learn how to store and retrieve data using S3 and EBS. These services can be used to store and retrieve files, images, videos, and other types of data.
  6. Create a database: Learn how to create and manage relational databases using RDS. This service allows you to create and manage databases in the cloud.
  7. Create a load balancer: Learn how to use Elastic Load Balancing (ELB) to distribute incoming traffic across multiple instances. This service can be used to improve the availability and scalability of an application.
  8. Auto Scaling: Learn how to use Auto Scaling to automatically increase or decrease the number of instances in an application based on demand. This service can help to ensure that an application has enough resources to handle incoming traffic, while also reducing costs by only running the number of instances needed.
  9. CloudFront : Learn how to use CloudFront as a content delivery network (CDN) service that securely delivers data, videos, applications, and APIs to customers globally with low latency, high transfer speeds, and secure connections.
  10. Route 53: Learn how to use Route 53 as a highly available and scalable Domain Name System (DNS) web service that allows you to route end users to internet applications by translating names like www.example.com into the numeric IP addresses.
  11. Get certified: AWS offers a variety of certification programs that can help you demonstrate your knowledge and skills as a cloud engineer. These certifications can be a valuable asset when looking for a job or advancing in your career.
  12. Continuously Learn: Cloud technology is changing rapidly, it’s important to stay up-to-date with the latest features and services, and to continuously learn new skills and best practices.

Conclusion

In conclusion, getting started with Amazon Web Services (AWS) as a cloud engineer ( AWS cloud engineer )can be a daunting task, but it is a worthwhile investment for anyone looking to pursue a career in cloud computing. With its wide range of tools and services, AWS provides a comprehensive and powerful platform for building, deploying, and managing applications in the cloud. By taking the time to learn about the various services and how to use them effectively, you can become a proficient AWS cloud engineer and take advantage of the numerous opportunities available in this growing field.

Order An Android App With Admob Ads : Click Here!